Cabinets and Countertop

I’m really enjoying the process of putting this van together. I might have saved some money by searching through the reusable building material stores for some of the parts. But I’ve just been buying everything new. Since the van is so tiny, the cost of covering the surfaces is also going to be minimal, even with nice materials.

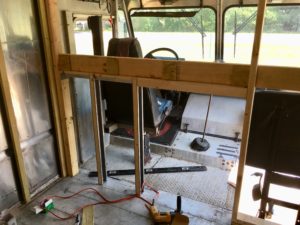
As far as the layout for the cabinets, I simply put things where I thought they ought to go and took measurements. I needed the wall under the bed platform to extend out far enough to catch the edge of the countertop and still allow room for trim. I also needed to ensure enough room to fit my mini refrigerator under the counter

C65FD9AD-3D40-41FC-B40B-6E426FC9FC83.jpeg


01D131D4-4379-4687-AC73-DEFAF3B8E9B1.jpeg

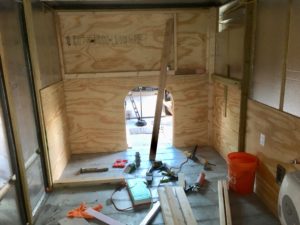
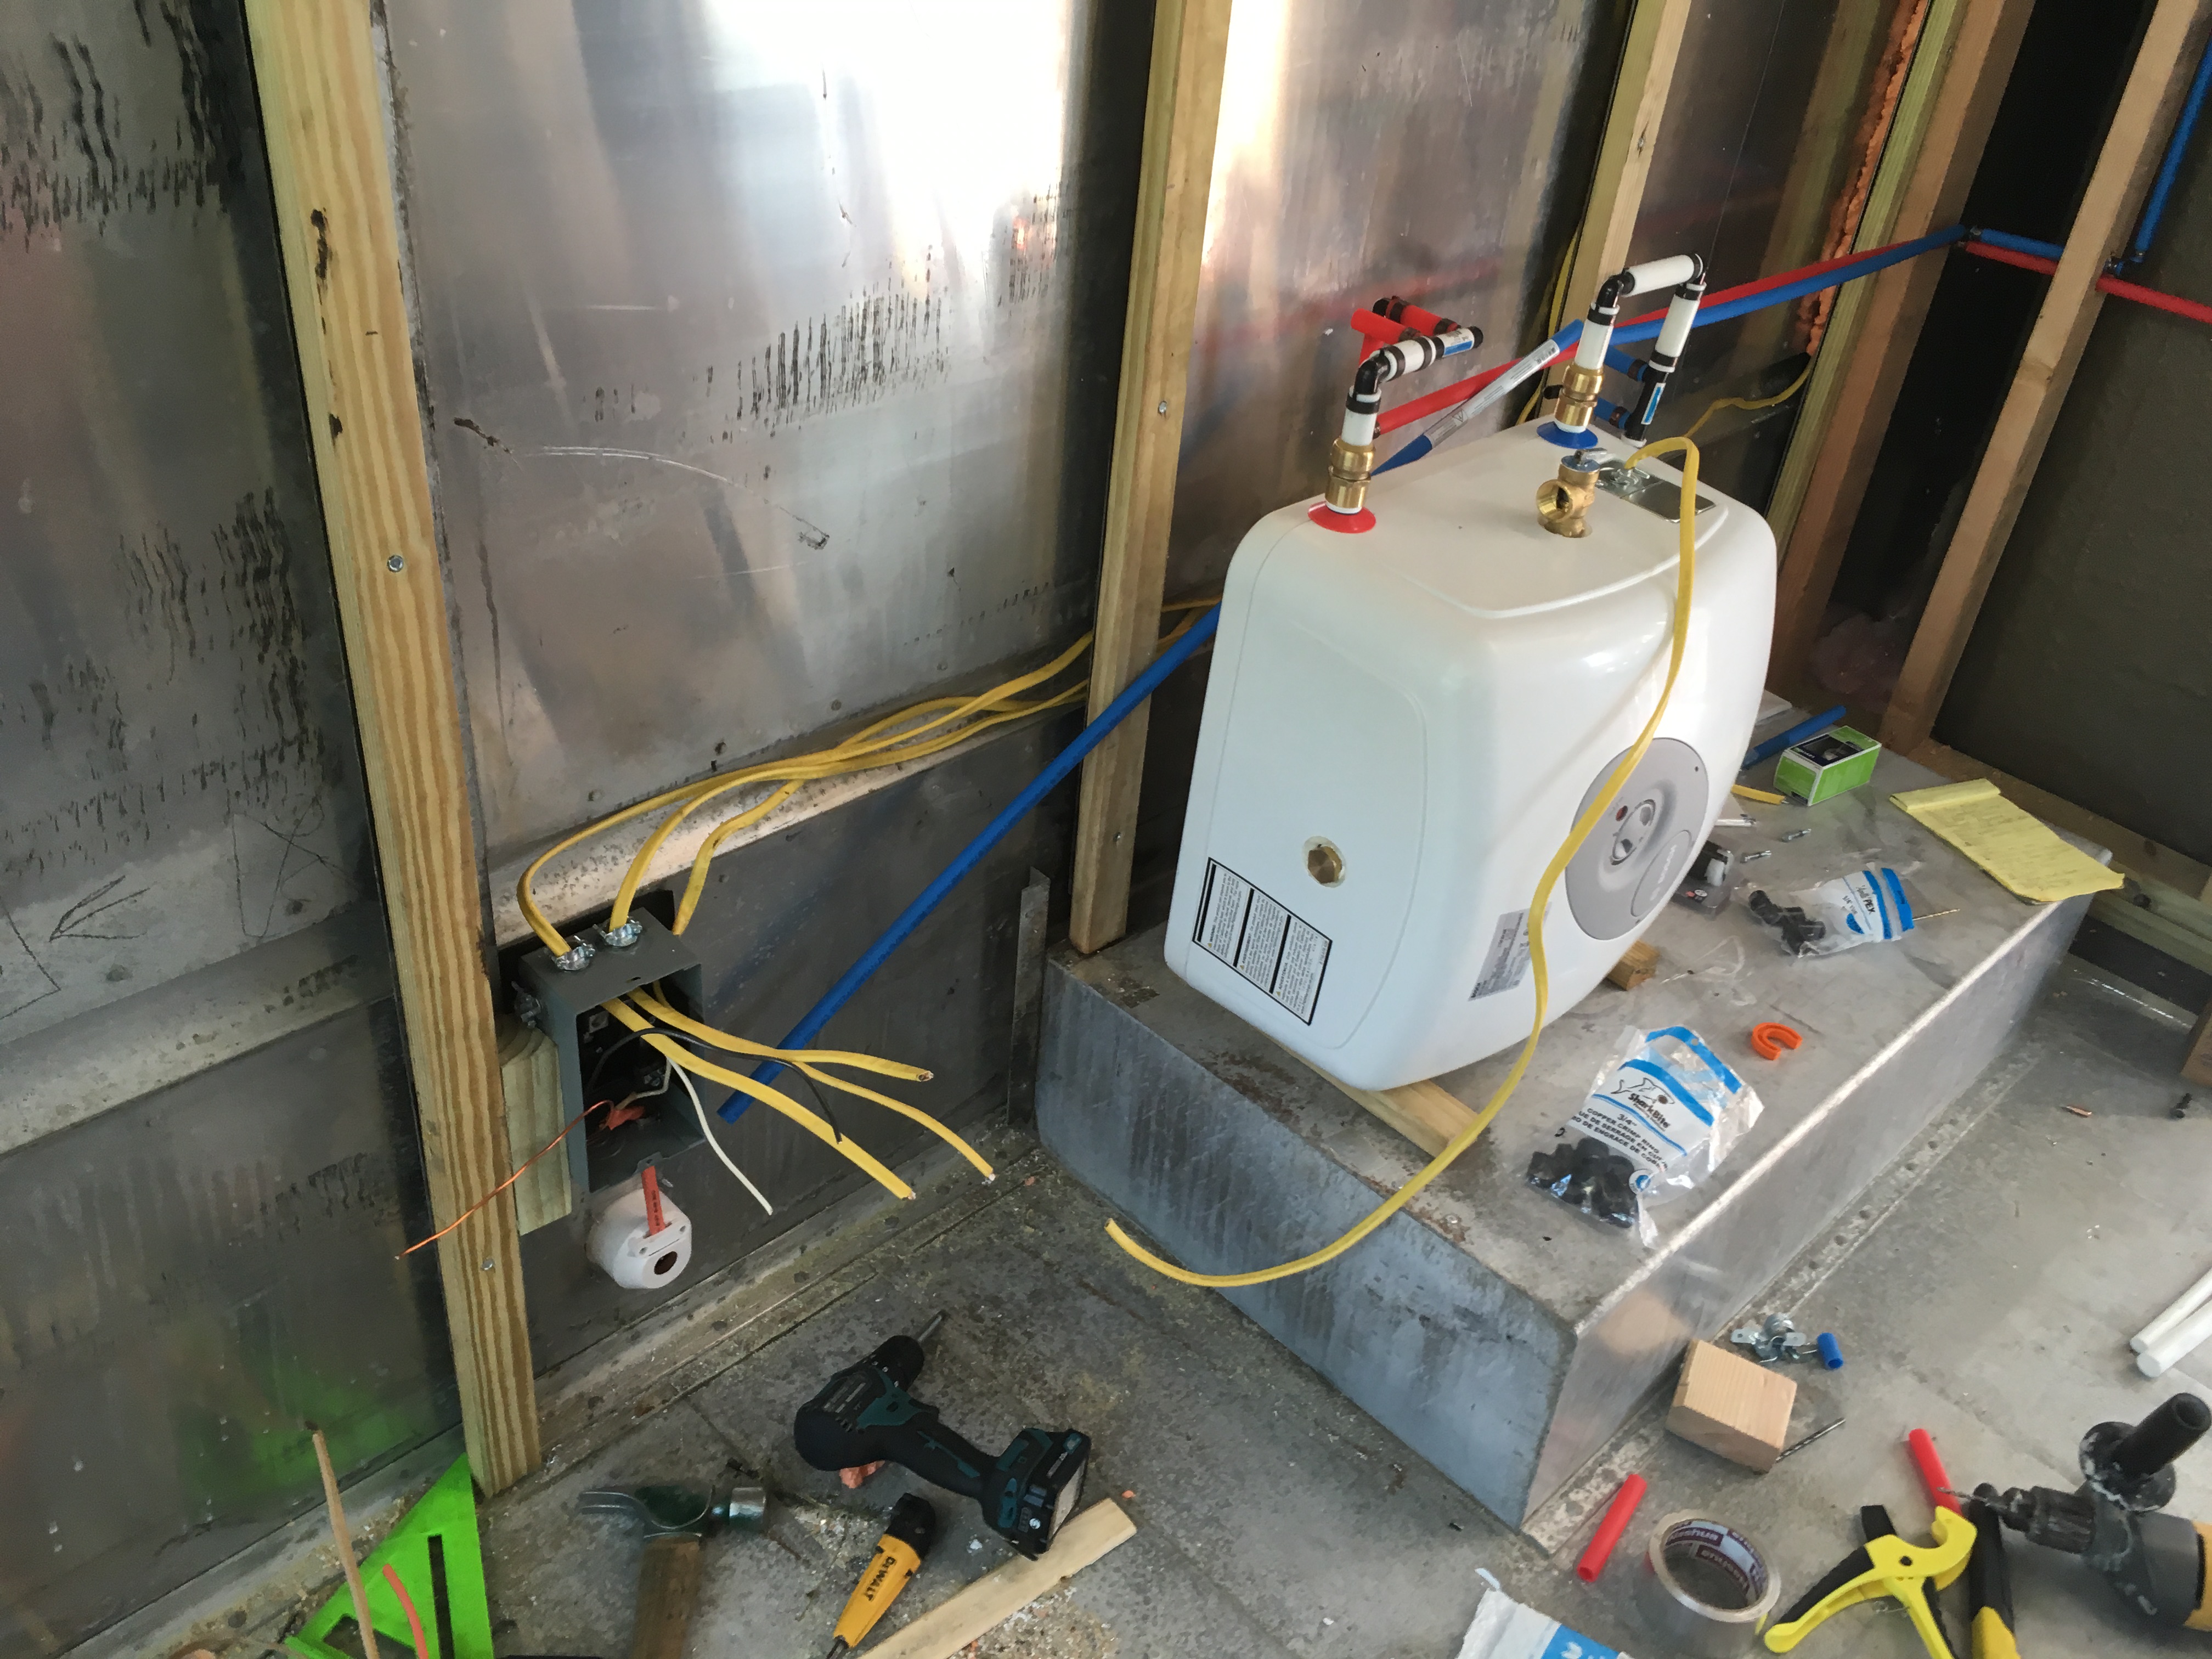
I built the cabinets with plywood, removed the water heater, and painted the insides.

D0E80BCA-36FC-414D-B83D-FEA45479CC80.jpeg

I reconnected the water heater, then installed the countertop and sink.

AA44D3CC-CCE7-4E96-B673-4F1EE7A59F75.jpeg

D0612B17-3E80-4DEC-A95A-796065F64C8B.jpeg

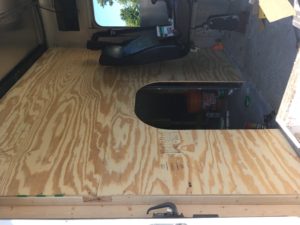
I discovered that the bead board plywood I got from Home Depot was going to need extra framing in order for it to lay flat on the walls. It’s naturally a bit warped and won’t lay flat without additional fastening. So, I decided instead to use primed shiplap for the walls and ceiling. I’m only going to use the bead board for some contrasting accent walls. The ship lap is much sturdier. It does not flex much over the two foot span between studs.

4B5AAD03-261C-4229-A5FB-EC18F7A0A419.jpeg

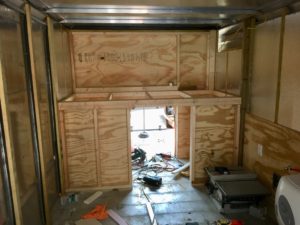
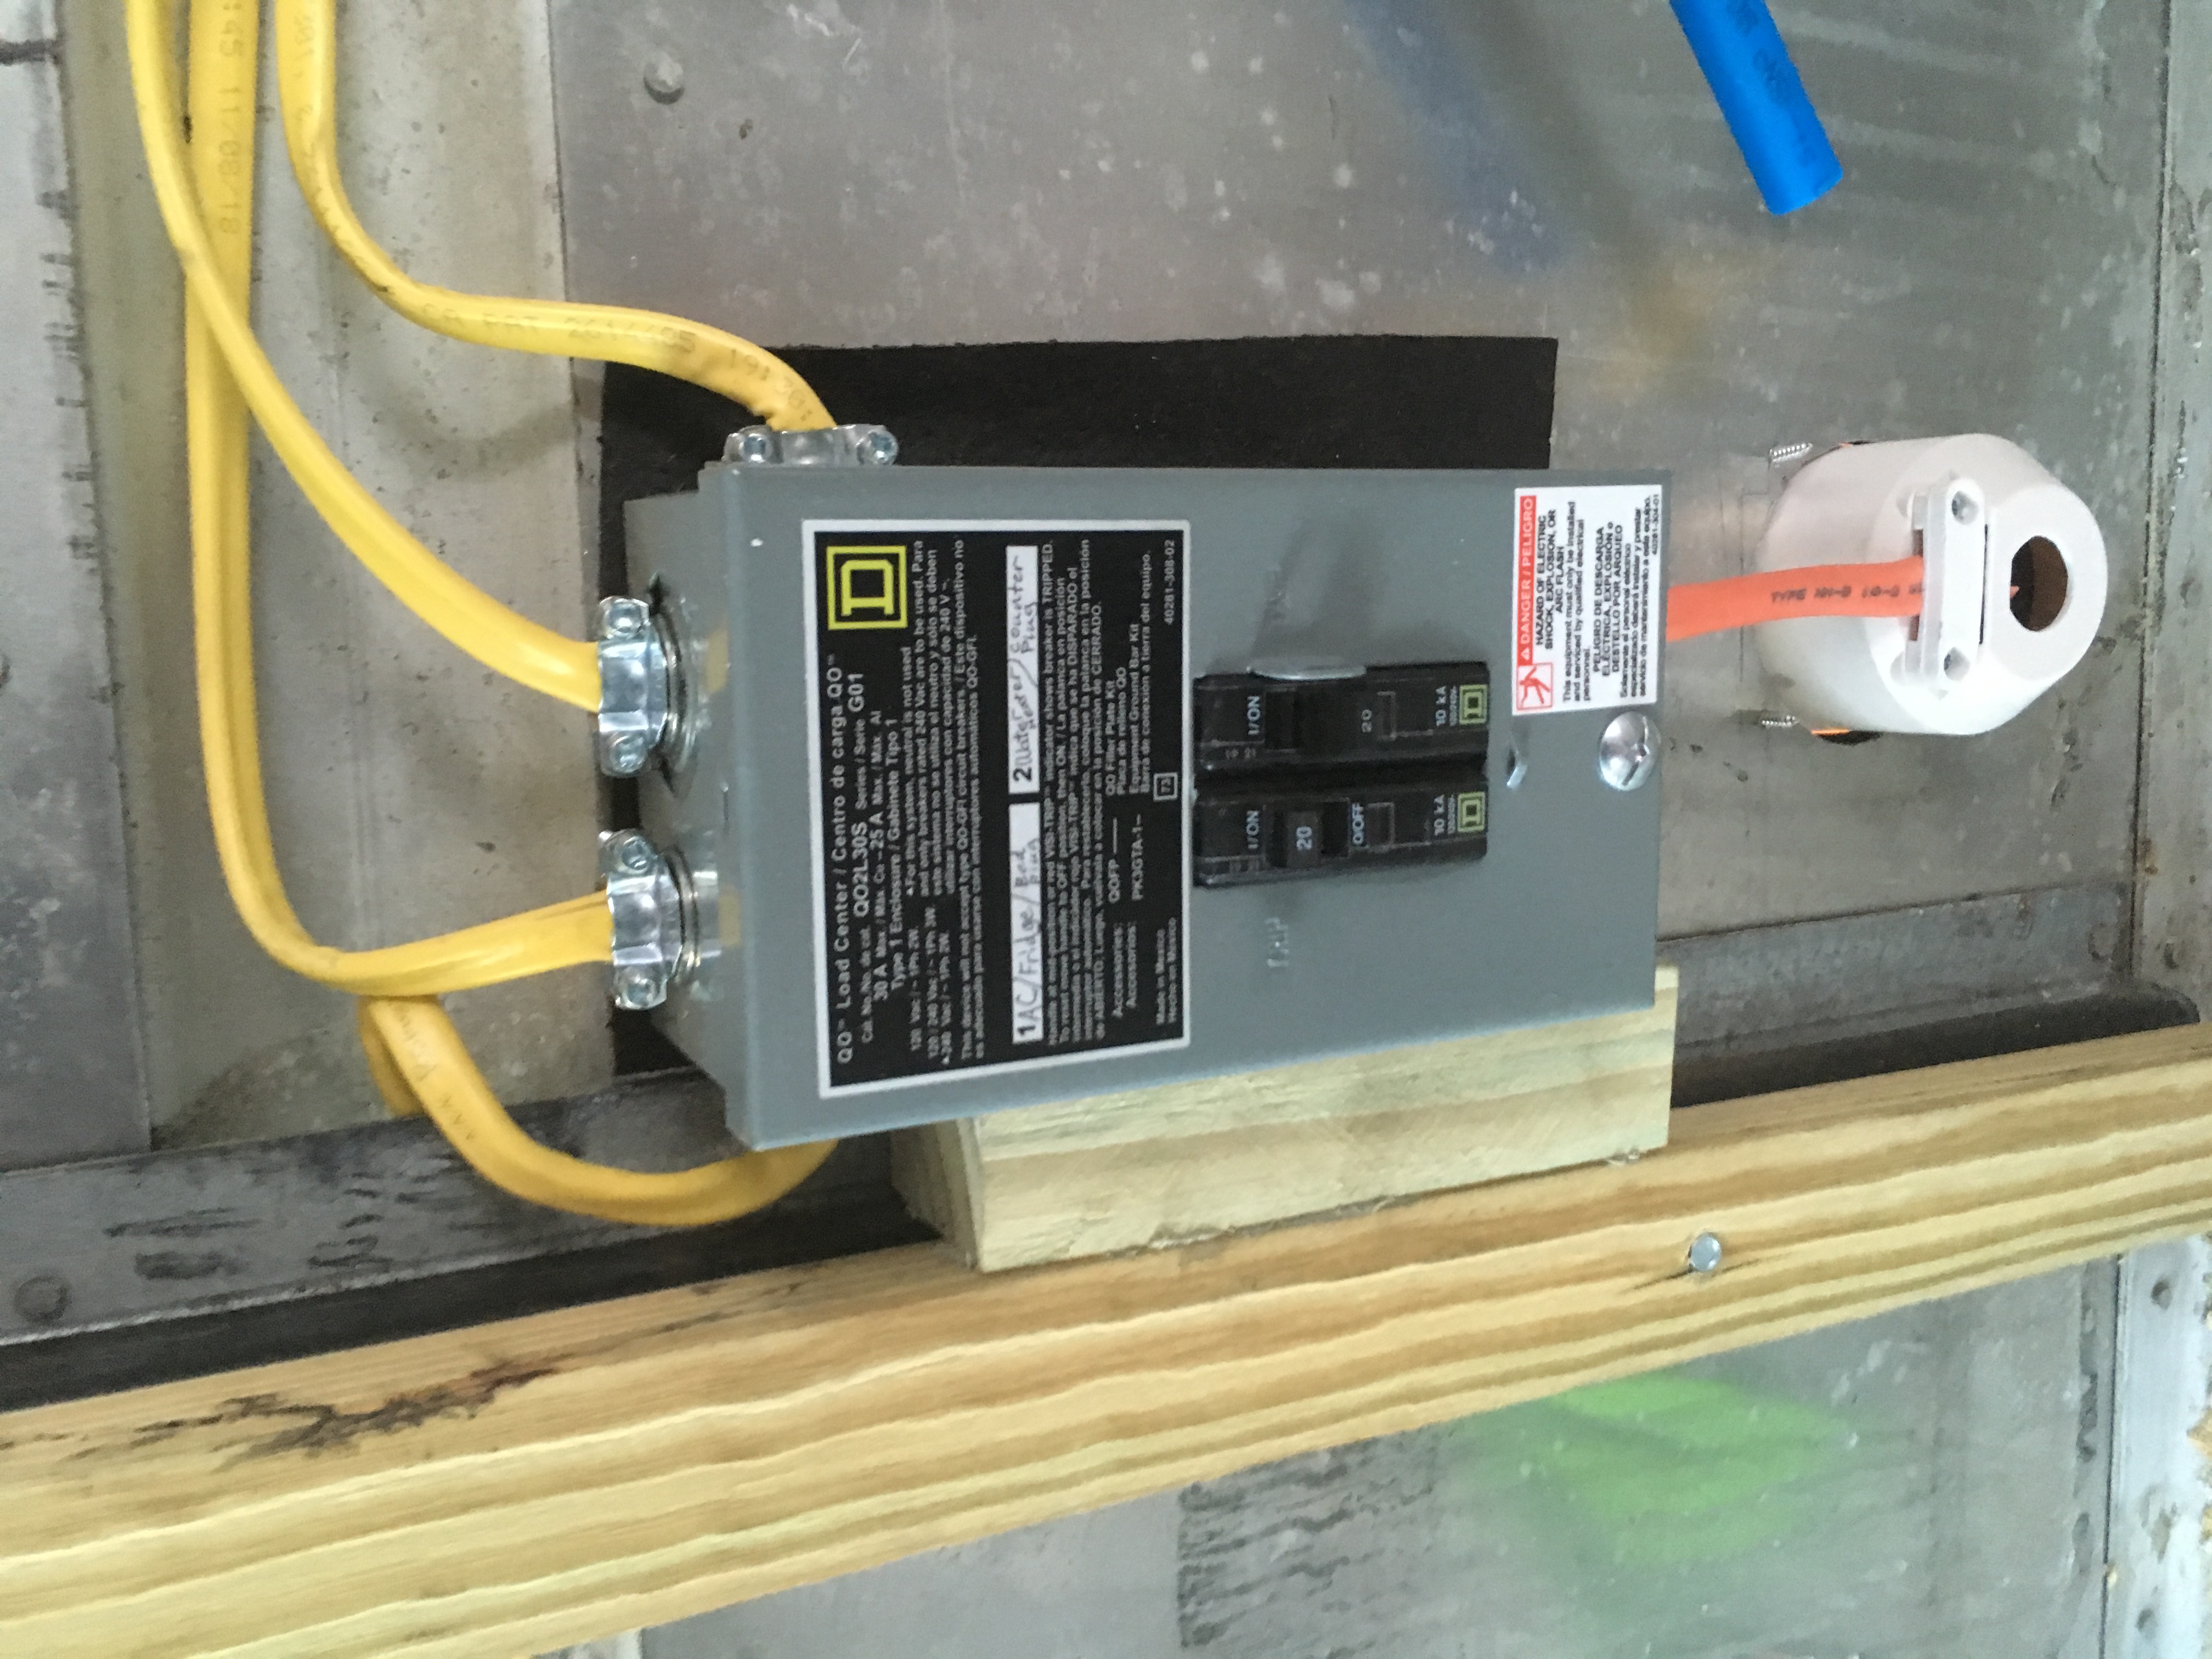
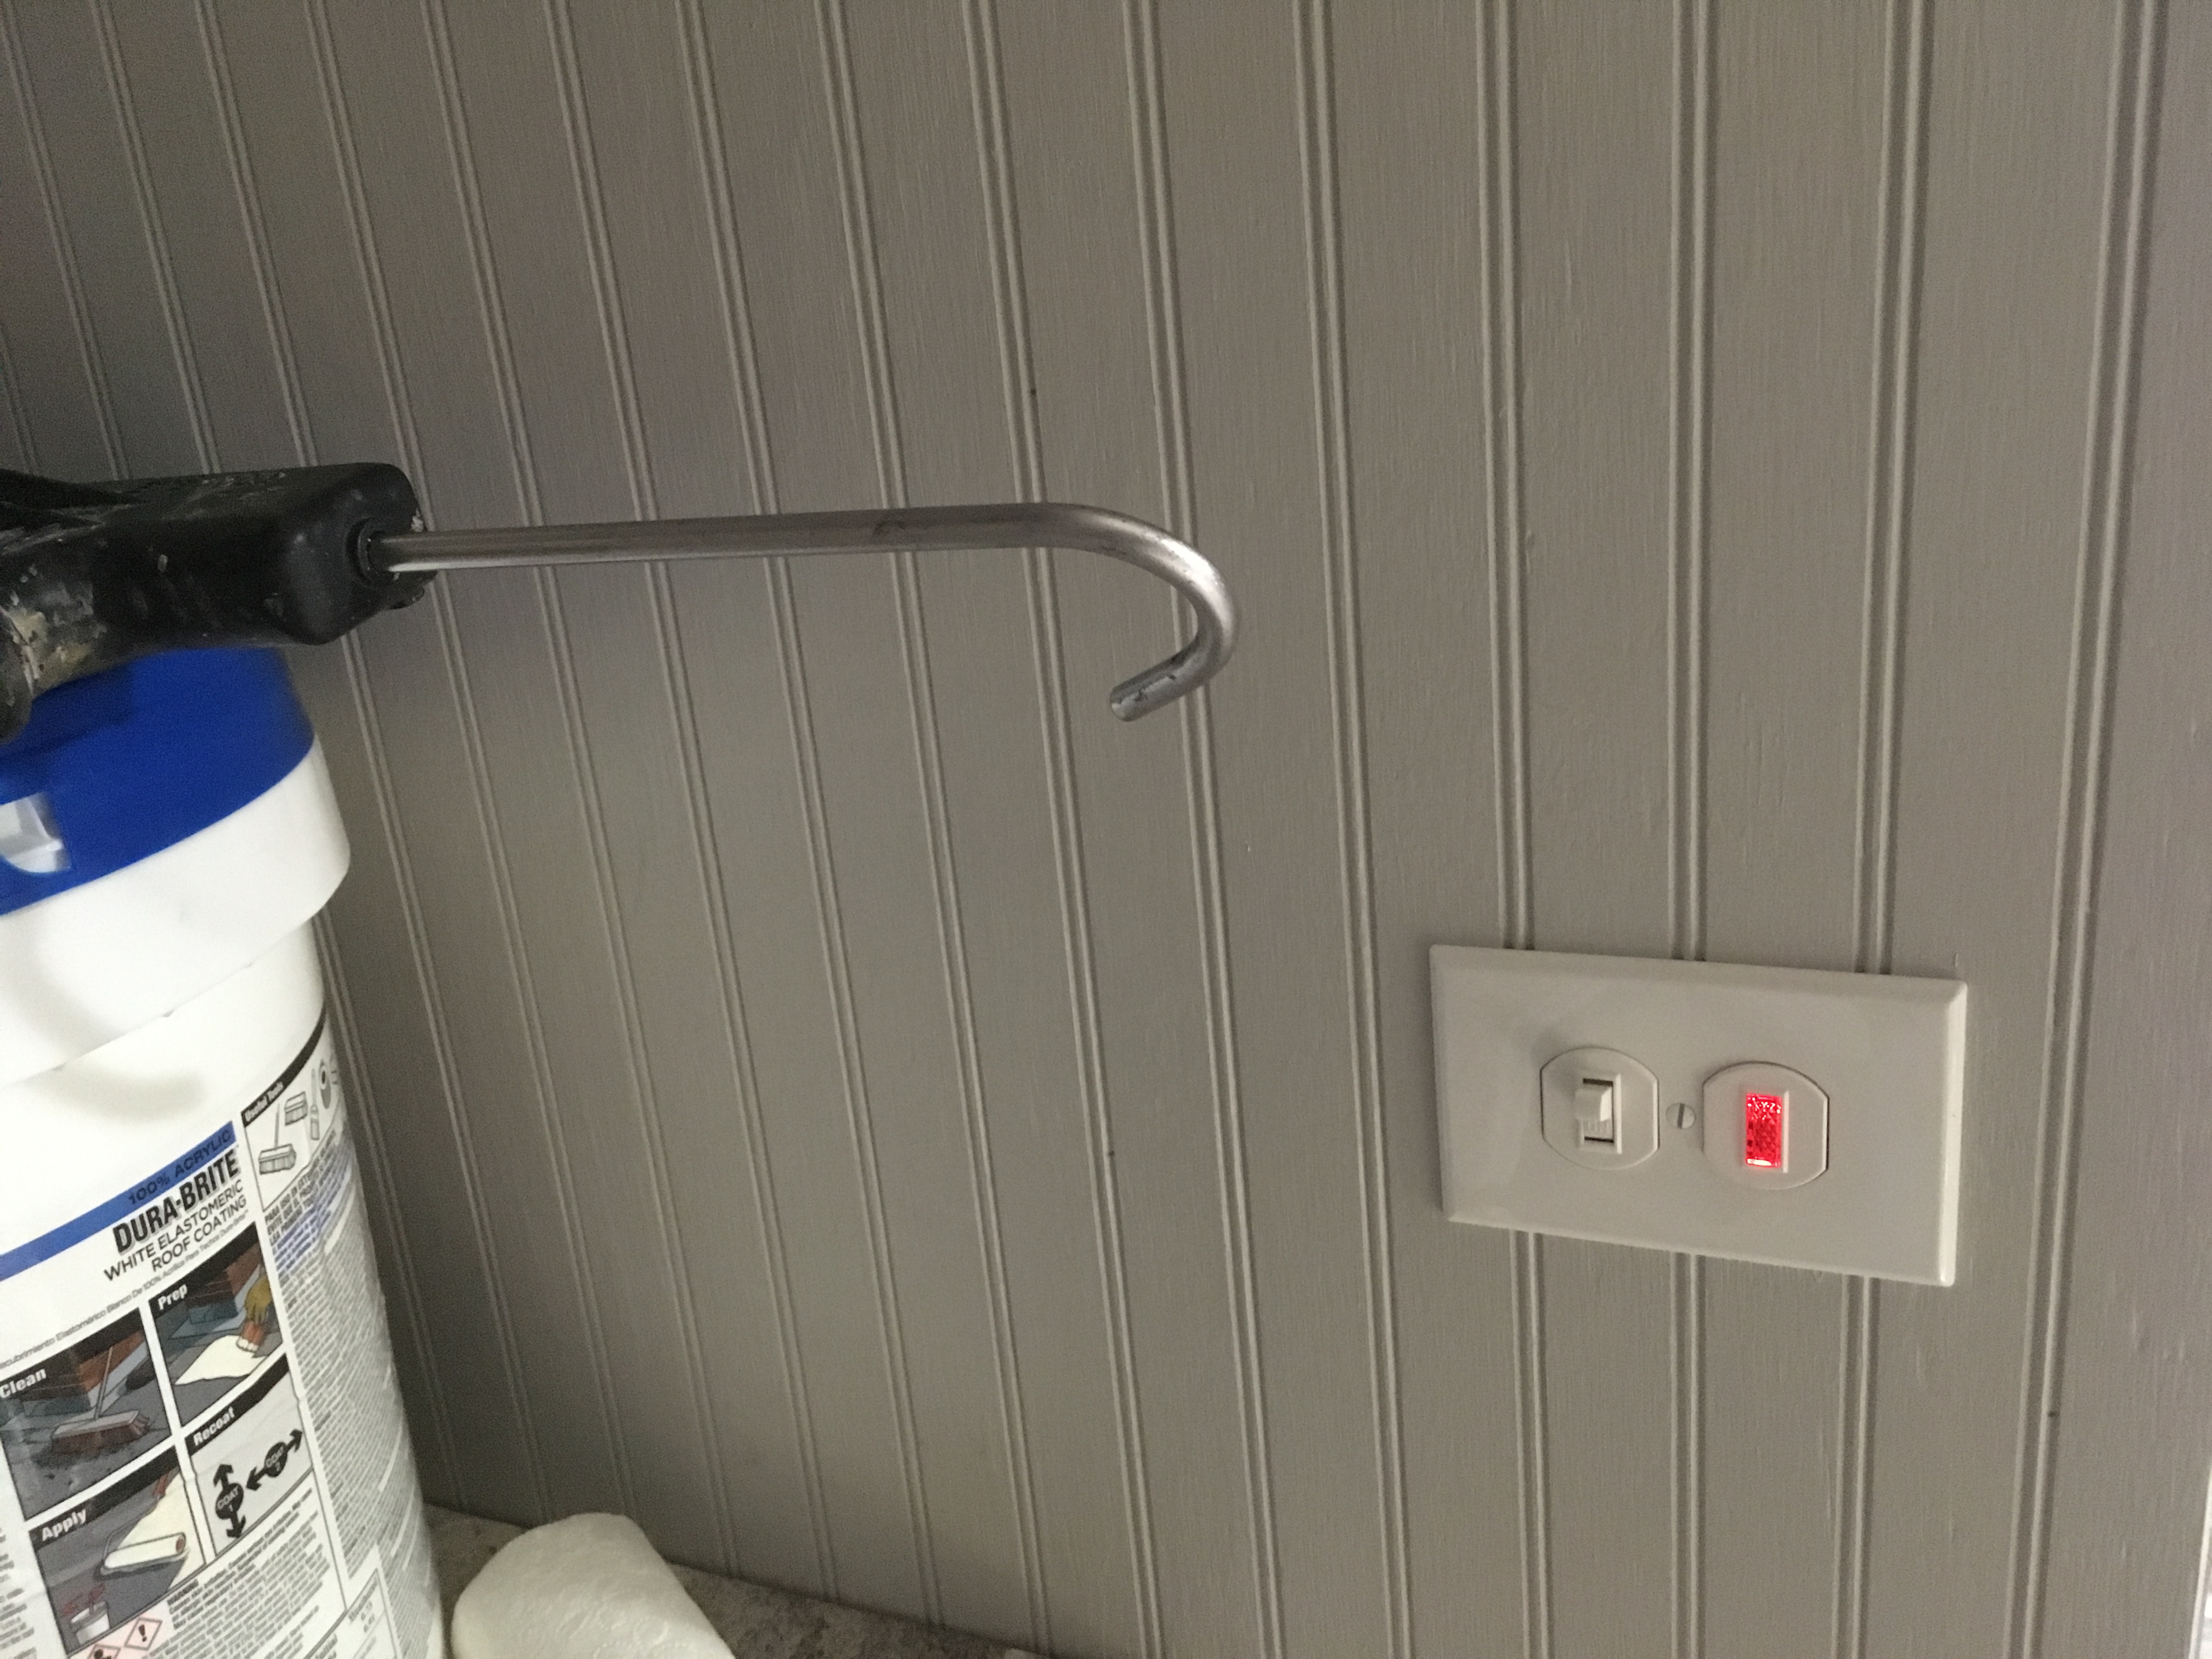
The kitchen area will eventually get a couple of upper cabinets. I think I will probably do more of the cabinet work next year. I also plan on installing an LED TV above and to the left of the sink. That is what the upper outlet is going to be for.

“I consider space to be a material. The articulation of space has come to take precedence over other concerns. I attempt to use sculptural form to make space distinct.”

~Richard Serra

Castle Wall frame & Loft

Life devoid of artistic expression is dull. Structures of old often had ornate design elements that gave them individual character. The turrets, towers, and dormers built into old Victorian houses here in America are beautiful to look at. Modern architecture however has become pretty basic. The landscape here is now covered in sad lifeless tract housing. In order to mass produce housing as cheaply as possible these cookie cutter houses have now become the norm. Malvina Reynolds wrote a song called  “little boxes” that describes this perfectly.

Anyone interested in vandwelling or tiny houses is already thinking outside of the “box”, but why not take it a step further? Your home should fuel your imagination and zest for life. As I reported in an earlier post, I built a real rock castle inside of my first step van. Your home is your castle right? Well, I plan on perfecting that design in this second van!

The substratum of the castle wall…

I am going to have a little curved hobbit door as the castle entrance. A hinged door would have taken up valuable internal space. I thought of a door that would draw upwards into the wall like in a real castle. But I decided that would have been complicated and gotten in the way of things I want to build on the back side of the wall. So instead, I decided to cut down a standard pocket door frame and have the door slide into the wall to one side.

After framing in the wall and door frame I sheeted it with 1/2” plywood and cut my curved castle door entrance. Later I will cover this wall with sheets of foam and carve a 3D castle into the foam using hot wire foam carving tools. There is a product called “styrospray” that is used to put a hard coating on finished foam sculptures that makes it more durable. I will be using this product before painting the rocks of the castle wall!

The castle door was offset slightly to one side because of the layout of the front seats. The door is about 30” wide x 40” tall, (perfect size for my inner child to crawl through)!

On the interior side of the wall I built a loft for my bed and will have two small closets underneath the bed on either side of the door.

“We don’t stop playing because we grow old; we grow old because we stop playing.”

~ George Bernard Shaw

120v Electrical

As I said in my last post, I’m setting the van up initially to be fully operational on 120 volts. This will require an umbilical cord to the grid but saves me a bundle while getting started with this project. I want to have all the comforts of air conditioning, hot water, and refrigeration without the high cost of RV appliances.

I am going to take steps little by little to be more off the grid and self contained in this truck. I have a 12v system in mind that includes solar panels on the roof, but solar panels will be a project for next year…

So let’s talk about 120v! It’s amazing to me that this magical and mysterious energy can be carried over vast distances using wires to perform all sorts of useful task. It’s hard to imagine what life would be like without electricity. I certainly don’t know everything there is to know about electricity. But I know enough to be dangerous as the saying goes! ????

The van setup is really pretty simple. I started out by cutting into the side of the van and installing a 30 amp RV plug connection. I ran the power to a small 30 amp service panel (just two breakers) that I got from Home Depot. I ran one circuit for the water heater on a 20 amp breaker with a lighted switch that reminds me when it is on so I don’t have too many things running at once. I also ran a circuit off the same breaker to a plug near the counter that can be used for power hungry household appliances (like a toaster oven) when not heating water. The counter plug also has built in USB ports. On the other breaker I ran wiring for the air conditioner, refrigerator, TV, and another plug. Lighting in the van will be 12v LED…

45EAA21C-2EBD-4A04-A235-9607F5267EE8

6958844F-FF33-4A94-A6F3-F36406DA683A

F740E16C-2325-4671-991E-24DE5B49CB30.jpeg

That’s pretty much it for the electrical. It’s wired like a house, just on a smaller scale! ????

A Hot Shower

It’s easy to take a shower with hot and cold running water for granted. It’s so routine that the miracle of it is rarely thought about, at least until you find yourself having to make due without it. I have found myself in such a position many times. The longest of which was when I spent half a year hiking the Appalachian Trail.

A nice shower is rejuvenating. It can change your whole outlook on the life. But the limited space available in smaller vans make setting up a shower very challenging. In the past I have used an inflatable kiddie pool as a catch basin and a solar shower hung from the ceiling in a pop top Volkswagen camper van. The quick way to get hot water from a solar shower is to put it in your backpack and walk into the bathroom at Burger King and fill it up in there ????

(If you are living in the same area for awhile and don’t have room for a shower in your van, a gym membership is a good solution for regular showers…and exercise!)

The massive size of this step van however gives me plenty of room to set up a shower. I prepared the back corner of the van and cut a hole through the aluminum floor for the drain using a jigsaw with a metal blade.

2B37B436-C65C-46F0-AA70-3DF76438787A.jpeg

I selected a one piece 32” fiberglass shower stall from Home Depot and framed a wall in to accommodate the plumbing. I chose a 7 gallon Bosch “point of use” electric water heater (like the small ones you sometimes see under sinks in restaurant bathrooms). The sticker price for compact appliances specific to boats and RVs is a bit high. They are more complicated then household appliances of similar size because they can be powered several different ways. There are RV water heaters that can run off propane, 110v, 12v, or even engine heat. It is around $600-$700 for one of those. I got this Bosch electric water heater for under $200. I actually decided to go all electric with the water heater, A/C, and refrigerator to start off with because it will save me over $2,000. That will help toward the total construction cost and I can upgrade later..

Anyway, here is the initial set up. I cut through the side of the van to install power and water hook ups.

61285D14-2F22-40AF-8CFC-7EB4BC92FF3B.jpeg

343828DF-F2F0-42F3-9947-D8B8207C08E6.jpeg

34D1B4AB-46A4-44E3-A516-1DE4A81D8E78.jpeg

I roughed in the plumbing using PEX tubing. I installed the same dual control delta shower valve and monitor that I installed in one of my apartments and really liked. You can adjust your temperature setting and control the flow of the water independently. This will be a handy feature when doing navy showers and trying to conserve water. I also purchased an extremely low flow Bricor shower head that only uses .6 gallons of water per minute.

Taking the time to set up a hot shower may seem like a hassle. In a way it adds complexity to a simple task…(heating up water, pouring it over your head, and then catching the waste water). But considering the effort of doing that everyday, the investment in setting this up is well worth it. In the next post I will be talking about the electrical system, which gives life to this wonderful little water heater.

Reduce the complexity of life by eliminating the needless wants of life, and the labors of life reduce themselves.”

~Edwin Way Teale 1899

Garage Door Removal

A lot of these delivery trucks come with rollup rear doors. It may be great for a delivery truck but not so much when you’re converting it into a tiny home. The garage door takes up quite a bit of space along the ceiling of the interior of the van. They do make these with hinged barn doors but I would say the rollup garage door configuration is more common.

IMG_0558

I’ve installed several garage doors in the past. There is a big spring that assists in the lifting of the door that you want to be careful of while removing it. It’s under a lot of tension and could potentially be dangerous when it lets loose. Going about the removal in an expeditious way, I partially closed the door to use it as a shield, reached in, and cut the cables from the outside. The spring let loose with a loud racket as it was unwinding and the cables were whipping around inside the van. Now I had the full weight of the door unassisted by the spring. I took the end stops off the track and pulled the door off into the interior of the van. You may want help for this as it is heavy.

I never wanted a rear roll up door on a step van but it actually turned out to be a good thing. Once it was removed I had a giant opening that I could frame in however I wanted.

I decided to offset the opening for a 32” hinged door (that I will later build). Putting the door opening slightly to one side would allow me room to install a 32 inch one piece fiberglass shower unit along the back corner of the van. I also had just enough room on the other side for a small 5,000 btu window air conditioning unit.

F7CCC882-1077-42AF-A4C9-02DA82D3F594

I used 1/2” treated plywood for the exterior sheathing and sealed everything real good around the perimeter. I thought about doing something fun like covering the back wall with cedar shingles, then adding a flower box, and a fancy door to make it look like a little house. But I decided it might draw too much attention. So I am going to cover it with white aluminum sheeting. I would like to be able park it in unconventional urban camping locations without drawing too much attention. The more it looks like a boring delivery van the better. I have been woken up by the cops several times in the middle of night while sleeping in camper vans. They are always polite and I’ve never gotten a ticket, but I’d like to avoid that as much as possible…

“The potter knows he plays with clay but works with space, For the use of the bowl is its empty space.

It is the same with the room, Made whole by the emptiness between the walls.

Remember that something is not everything. Nothing is also essential.”

~Lao Tzu

Wall Framing

Mai dearest friend said that she enjoyed reading about the castle history more than the dry wordy post about the particulars of construction. I will try to include a little of both as it is my hope that a few reading this may be inspired to do the same and find some of the details useful. So let’s get technical…????it’s actually really simple once you know what things are called.

Anyway, after borrowing my buddy’s power washer and thoroughly cleaning the van, I went to Lowe’s and picked up some premium 5/4” treated decking. There are nice sturdy steel ribs on 24” centers going down the walls and ceiling of the van. They stick out 1” from the outer aluminum body. I ripped down the 5/4” decking into strips (they call it 5/4” but it’s actually 1” thick after milling). I got three 1.75” cuts out of each deck board and fastened them to the steel ribs to make my “studs”. This gives me a solid anchor point for attaching things. I pre-drilled pilot holes and used heavy duty 1.5” self tapping lags screws to attach the treated studs.

This arrangement gave me a wall depth of exactly 2” to the inner nailing surface of the studs. Perfect for 2” thick foam board. As I mentioned earlier, condensation forming on cold metal can be a problem in a van. You need more than a good vapor barrier to keep the moisture in the air from condensing on the walls. My personal thoughts on this is to use solid foam board insulation, then filling every void, nook, and cranny with spray foam. Purchasing a foam gun for a project like this is a good idea. The straws in the disposable cans always get blocked up if you let them sit. A foam gun is more economical for a bigger project and gives you more control when dispensing the product. Plus you can let it sit between uses without any cleanup.

F8B4FA8B-4BD4-42CA-80C2-AE4CCB1A95A9

There are several different types of foam board at places like Lowe’s and Home Depot. The expensive foam, the more expensive foam, and the really expensive foam. I chose to use a moderately expensive 2” foam board with a Mylar reflective backing. It may be tempting to some to throw some cheaper fiberglass insulation in the walls. I have heard people claim that it works with a good vapor barrier in a van, but I don’t think it’s a good idea. If any moisture does penetrate the wall the fiberglass will wick it up like a sponge and cause mold problems. My philosophy is to fill the voids with solid foam either of the expensive type or the more expensive type and seal it off good.

As a side note, I decided to use treated lumber wherever the wood meets the metal surface of the van not only because the 1” thickness was convenient, but also because of its moisture resistance. In construction treated lumber is always used against concrete foundations before transitioning to white wood. This may be unnecessary in a van if you covered the metal with window wrap tape or tar paper before fastening white wood to it. Overkill?…you decide. I also left the treated lumber out in the sun for a bit to dry it out before installing it.

“If you will live like no one else now, later you can live and give like no one else.”

~ Dave Ramsey

Castle History

In all honesty I have been thinking about how I would design my next step van for many years. When I was 19 I moved to California and bought my first step van. Rent was high in the bay area and living in a van was a great way for me to save money. The money I saved by not paying rent allowed me to travel to Hawaii, Japan, Thailand, and Myanmar.

When I was living in California I met a fun loving and energetic old hippie named Rumple. He had been living the mobile lifestyle in vans, buses, and boats for most of his life. He shared his enthusiasm and was very supportive of my creativity while I was putting my van together.

My first step van was an older one with a steel body and a 6 cylinder gas engine. It did not have dual rear wheels and though it did have standing head room it was not a high top. The van was called the Gray Whale as it sort of looked like a giant gray whale. The previous owner had a mural of whales and “Gray Whale Company” written on it, so I too called it the Gray Whale. And like Jonah, I lived in the belly of a great whale. But unlike Jonah I didn’t have much to say to the people about repentance at the time as my life was filled with riotous living.

4C316D73-166B-4744-B164-3316B519B704

The most exciting design feature of that van was the rock castle I built to separate the drivers compartment from the back of the van. I made it with real rocks gathered from a river and some leftover paving stone. I treasure the memory of that time because of the freedom I felt. There were no limits imposed on my creativity.  My friend Rumple encouraged me to stretch the boundaries of normal and practical with my artistic ideas. The rock castle symbolized that. It was fun, totally bizarre, and completely impractical. It added a ton of weight to the van as well as stress to the engine and chassis. But it was a sight to behold! While I was working on it at the beach one day in San Francisco a guy told me I should take it to Burning Man. I remembered Rumple telling me about burning man too, so I went. Words can not describe all that I experienced there. But I will say, they were having a parade one day and I gave a ride to an entire marching band in the back of my van, tuba and everything. Seeing all the art cars and mutant vehicles there was unlike anything I had ever seen before!

2DCE55E9-0F14-4A31-A9A7-1753CA137919

Eventually, the steep roads in San Fransisco and weight of the rock castle caused the engine to blow in that tired old van. But the memories have never left me.

For years I have dreamed of a newer aluminum boxed step van with dual wheels that could handle more weight. One with a higher roof that could better accommodate a loft for a bed. And it occurred to me that if I carved the castle wall out of foam it would be both lighter and add some insulation…

The seed of a dearly held old dream has now sprouted and broken through to the surface.

IMG_1741

Gutting the Van

The step van had some sheet aluminum riveted onto the metal ribs along the walls and ceiling. The first order of business is to gut and power wash the inside and the outside of the van. There was a bit of old insulation behind the walls as well as a plywood divider between the drivers compartment and the rear of the van.

It was all taken out. I added the aluminum sheeting pulled from the van to a little aluminum pile I had been saving. I got about $60 for it when I recycled it at the scrap yard $$

Condensation on the metal walls and ceiling can be a problem in a van. Once I pulled off the riveted paneling I could see some mold behind the walls. I mixed a spray bottle with 50% bleach 50% water and sprayed all the mold. After letting it sit for awhile I power washed the entire van inside and out. I am going to glue 2” foam sheets to the walls and seal it up real good with spray foam to prevent condensation on the inside of the van.

New Step Van Project!

540A97D9-C858-4D1D-9414-1566E09B9B47 2

It’s time to go beyond thoughts and philosophy. I have purchased a new step van project. I found a 1993 Freightliner M35 with a four cylinder Cummins diesel engine on craigslist for $3000. This was a lighter duty bread truck owned and fleet maintained by Sara Lee. It has a four-speed manual transmission and is SO MUCH fun to drive! It came with a folder of the maintenance records going back 20 years. At the end of its service life with Sara Lee this van was purchased by the fleet mechanic who had taken care of it all those years. He had planned to turn it into a toy hauler motorhome but never got around to it. The van has high miles (345,000). Commercial vehicles are a little different though. I have heard of well maintained diesel engines going up to a million miles. But I suspect there may be a costly engine replacement sometime in the future for this van and I am mentally prepared for that. Many of the step vans that I have looked at up to this point with diesel engines have been over $10,000. Someday down the road I may be into it for that much when I go to replace the engine. But it is running and driving good right now. The transmission has been rebuilt and the truck starts right up every time without hesitation. The tires seem to still have plenty of tread on them although there are some cracks in the side walls. Other problems include the sending unit in the fuel tank is not working so I cannot tell how much fuel is in the tank. The seller provided me with a new sending unit however. Lastly, This van has a rollup rear garage door which is something that I never wanted in a step van. Roll up doors take up interior space, so I am planning on removing it and framing it in.

Disclaimer: Getting into a project like this is not for the timid. I am well qualified for a task like this because I do home construction and remodeling. A young person may want to employ the help of their father or grandfather to do some of the things I’m about to do. It’s best to keep things simple and not over complicate the task. Though a tiny home or a van remodel is a much smaller project compared to building a regular house, it still takes some effort. Don’t complicate things so much that you get overwhelmed and can’t see it through to completion!